RELOADING 110 CASSETTES
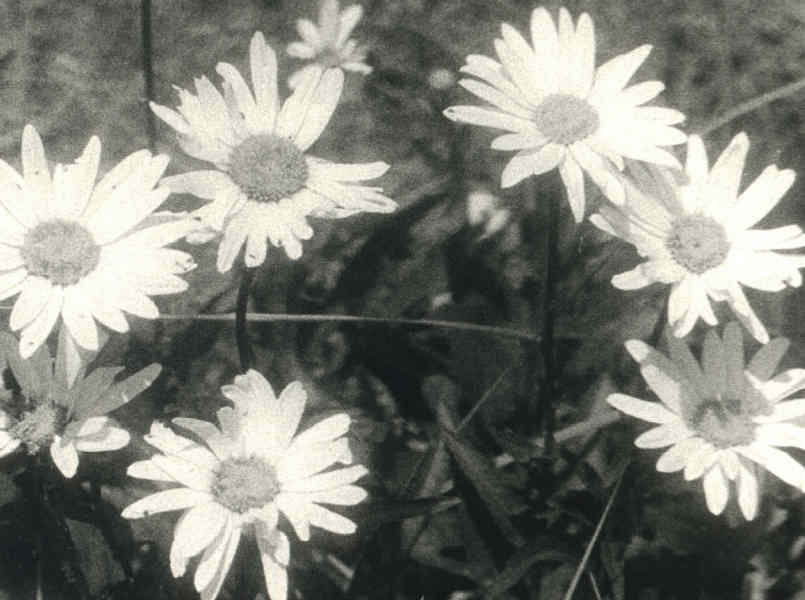
The above picture was taken with a Minolta 110 SLR. That's the easy part. The hard part is taking a B&W picture with a 110 camera since 110 cassettes are hard to find. But this Kodak 110 cassette was reloaded with Ilford HP5 B&W film.
Although films of various types were available for 110 cameras, the cameras could only be set for 100 ISO or 400 ISO. (Some cameras have +/- compensation knobs, so that other film speeds can effectively be used) In fact, the earliest 110 cameras were only designed to use 100 speed film. You can tell if a particular camera is designed for both film speeds by checking the inside of the film chamber. The film cassette had a tab or ridge on the right-hand end (the end without the hole in the middle) to tell the camera what type of film it is. If the camera has a small "arm" inside the film chamber to sense this film cassette ridge, the camera can be used with both film types. This is important, especially, if you reload your own cassettes. Depending on the film that you are loading into the cassette, you may want to get a 100 speed or 400 speed cassette. On the 100 speed cassette, the film speed ridge runs from the top to the bottom of the cassette. On the 400 speed cassette, the ridge that engages the camera cog only runs halfway -- from the top to the middle. The cassettes made today appear to only be the 100 ISO cassette. If you reload your cassettes with 400 speed film, and all you have are 100 speed cassettes, it's easy enough to cut off, or file off, the bottom half of the cassette film speed ridge.
16mm film is the same width as 110 film. With effort, you can load 110 cassettes with 16mm film. And IF you have the right camera, these reloaded cassettes will work. But it depends on the camera. All 110 cameras have a special cog on the edge of the film plane that reads the special 110 film perforations. This cog usually performs two functions. First, it stops the film advance at the right spot. You see, 110 film is normally pre-exposed with the frame numbers BETWEEN the frames, so the film must be positioned precisely, so that the images will fall between the frame numbers. In addition, the cog (on most cameras) cocks the shutter.
What type of film you can use in your camera depends on the type of 110 camera you have and how it operates.
You first need to determine if your camera uses the film perforations to cock the shutter. First, remove
the 110 cassette from the camera and leave the back open. Press the shutter release and advance the film.
The lever or wheel should advance without stopping since there is no film in the camera to stop it.
Now press the shutter.
A. To reload the cassette, you first have to take the cassette apart -- see https://www.instructables.com/Disassemble-and-Reload-a-110-Film-Cartridge/. This is not difficult if the room lights are on, but if you have exposed film in the cassette that you want to develop, you'll need to try to deconstruct the cassette in a dim light -- not an easy task. So, if it's your first cassette, just kiss the film inside goodbye. Turn those lights up, so you don't lose a finger. Carefully split the cassette along the seams with an X-acto knife. You don't need much pressure on the glued seams, but the seams are hard to find. If you are looking at the back of the cassette, one seam runs along the top UNDER the lip that runs along the top. The seams also run right down the middle of the tabs on each end of the cassette. On the bottom, the seams run around the front edges of each film spool. You may end up ruining your first cassette, but everything gets better with time! When you get it appart, you'll see that the film is attached to a spool in the take-up spool and is pulled out of the supply spool.
It's best to use unperforated 16mm film, but you can use single perforated 16mm film with the following considerations. If you are using single perforated film, place the perforations in the cassette on the TOP of the cassette. This way the perforations will fall on the OPPOSITE side from the film cog. If you put the perfs on the SAME side as the film cog (or use use double perf film), the cog will engage the film perfs and stop the film advance prematurely. In addition, with single perf film the image size is reduced slightly to 12x17mm instead of the full 110 format of 13x17mm. What this means is that if you have a 110 negative carrier, you'll have to mask the carrier. Otherwise, you'll end up with perforation holes in your image which will cause fogging in the rest of the image.
Measure the length of the old film and discard it. The length will vary based on the number of original exposures in the cassette. 110 cassettes can hold about 760mm (30") of film WITH paper -- MAX. Your cassette (and paper backing) might be less than this. If you want the exposure numbers to appear in the film window you will need the film and paper backing to be the same length, approximately. But if you don't need the film numbers, you can cover the counter window with black tape and load the cassette without the paper backing. This has the advantage of loading more film into the cassette! The choice is up to you.
Practice the next steps in the light first. If you are using the paper backing, cut a piece of new film the same length as the old one. It you don't have the old film, measure a length of film about 6 inches shorter than the backing paper. At the supply end of the paper (the end opposite the take-up spool), hold the film about 4 inches from the end. There may be a notch in the paper that you can use as a starting point. Make sure that you place the film-back to the paper-front. One side of the paper-film sandwich, you should see the film emulsion, and on the other, the back of the paper with the numbers. Then roll the backing paper and film up tight in the supply side. The backing paper is always attached to the take up spool. Coil the start of the film with the backing paper into the take up spool. There is no need for tape, the backing paper pulls the film along, but make sure that the film goes around the take-up spool at least once. Close the cassette with black tape along the seams -- make sure you keep the cassettes out of bright light. If you are NOT using the paper backing, remove the paper backing and tape the film to the take-up spool and wind it around.
To use the reloaded cassette, advance the film in the window number to number, since there are no perforations to stop the film advancement automatically. With some cameras, such as the Minolta 110 zoom SLR, Fiji 200F, Canon 110's, and many others there is a "safety" feature that you need to override in order to use the reloaded cassette. Just below the bottom of the film plane frame of the camera -- not on the door or on the cassette, but on the camera body itself -- is a tiny tab that tells the camera if a cassette is loaded. It can be very hard to see, but you'll need to find this lever and make a small notch in your cassettes at this exact point so that this lever is NOT pushed in by the cassette. If the lever is pushed in, the shutter will not fire with a cassette loaded with 16mm film with these cameras.
B. First, you need to determine if your CAMERA and/or 110 CASSETTES can be modified to operate correctly without perforations. Download the PDF file -- "Preparing a notched 110 film cartridge for use in certain 110 cameras.PDF" -- at https://submini-l.groups.io/g/main/files for instructions on how to do this.
To reload the cassette, you first have to take the cassette apart -- see https://www.instructables.com/Disassemble-and-Reload-a-110-Film-Cartridge/. This is not difficult if the room lights are on, but if you have exposed film in the cassette that you want to develop, you'll need to try to deconstruct the cassette in a dim light -- not an easy task. So, if it's your first cassette, just kiss the film inside goodbye. Turn those lights up, so you don't lose a finger. Carefully split the cassette along the seams with an X-acto knife. You don't need much pressure on the glued seams, but the seams are hard to find. If you are looking at the back of the cassette, one seam runs along the top UNDER the lip that runs along the top. The seams also run right down the middle of the tabs on each end of the cassette. On the bottom, the seams run around the front edges of each film spool. You may end up ruining your first cassette, but everything gets better with time! When you get it appart, you'll see that the film is attached to a spool in the take-up spool and is pulled out of the supply spool.
If you can modify your CAMERA and/or 110 CASSETTES to operate correctly without perforations, you can use any type of perforated or unperforated 16mm film. Otherwsie, you will need to use double perforated or single perforated 16mm film. If you are using single perforated film, place the perforations in the cassette on the BOTTOM of the cassette. This way the perforations will fall on the SAME side as the film cog. If you put the perfs on the OPPOSITE side as the film cog (or use unperforated film), the cog will not be engaged and the shutter will not cock. With single perf film the image size is reduced slightly to 12x17mm instead of the 110 format of 13x17mm. With double perf film the image size is reduced even more to 10x17mm. What this means is that is you have a 110 negative carrier, you'll have to mask the carrier. Otherwise, you'll end up with perforations holes in your image which will cause fogging in the rest of the image.
Measure the length of the old film and discard it. The length will vary based on the number of original exposures in the cassette. Practice the next steps in the light first. Cut a piece of new film the same length as the old one. It you don't have the old film, measure a length of film about 6 inches shorter than the backing paper. At the supply end of the paper (the end opposite the take-up spool), hold the film about 4 inches from the end. There may be a notch in the paper that you can use as a starting point. Make sure that you place the film-back to the paper-front. One side of the paper-film sandwich, you should see the film emulsion, and on the other, the back of the paper with the numbers. Then roll the backing paper and film up tight in the supply side. The backing paper is always attached to the take up spool. Coil the start of the film with the backing paper into the take up spool. There is no need for tape, the backing paper pulls the film along, but make sure that the film goes around the take-up spool at least once. Close the cassette with black tape along the seams -- make sure you keep the cassettes out of bright light.
In the end, if your camera requires the 110 perforations for the shutter cocking -- the perforations on 110 film are about 25mm apart while the perforations on 16mm films are about 8mm apart. If you use 16mm film, the cog in the 110 camera will catch the 16mm perforations and stop the film from advancing its full amount. You'll end up with overlapping images. To use a reloaded cassette, AFTER each exposure, you'll need to advance the film until it stops -- and then fire the shutter WITH THE LENS covered. You may need to do this once or twice depending on your camera. Then you can take your next picture. You can use the numbers on the film paper-backing as a guide, but it's best to test a roll of film to be sure. KEEP GOOD NOTES!!!
1. Specifically, take a first picture on the roll.
2. Advance the film. It will probably only advance 8mm and it will cock the shutter.
3. Then take another picture. You will probably end up with a partially over-lapping picture.
4. Then advance the film. It will probably only advance 8mm and it will cock the shutter.
5. Cover the lens and fire the shutter.
6. Then advance the film. It will probably only advance 8mm and it will cock the shutter.
7. Uncover the lens and take a picture. You may or may not end up with a partially over-lapping picture.
8. Then advance the film. It will probably only advance 8mm and it will cock the shutter.
9. Cover the lens and fire the shutter.
9. Then advance the film. It will probably only advance 8mm and it will cock the shutter.
10. Keep the lens covered and fire the shutter.
10. Then advance the film. It will probably only advance 8mm and it will cock the shutter.
11. Uncover the lens and take a picture. You will probably not have a partially over-lapping picture.
12. Develop the film. This will tell you if you have to COVER & FIRE the shutter once or twice between each actual exposure.
It's a nuisance, but it works.
Here are some examples. Tests have revealed that the Kodak Ektra 2 (and similar models), the Kodak Tele-Instamatic (and similar models), the Kodak Tele-Ektra (and similar models), need ONE BLANK FRAME between each actual exposure -- while the Keystone 710 (and similar models) need TWO BLANK FRAME between each actual exposure.
In either case, if you are using single-perforated film, make sure that the 16mm perforations are on the same side of the camera as the tiny shutter-cocking lug -- and realize that with perforated film, the perforations will appear in the image on the film. These can, of course, be cropped out later.
You might also want to check out
https://www.35mmc.com/06/09/2023/investigating-a-110-cartridge-and-film-for-possible-re-use/
Who knows why they are covering 110 film cameras, but we know that they are irresistable, don't we?

To return to the main index for the Sub Club click here.
COPYRIGHT @ 1995-2025 by Joe McGloin. All Rights Reserved.