MAKING JUMBO PRINTS
Submini prints require enormous enlargement. For example, most 35mm
shutterbugs consider a 16x20 print quite a challenge. And it is. It
requires a 16X magnification of the image. To get a 16x20 from a typical
submini negative (10x14mm) would require a 40X enlargement. A 16X print
would only produce a 5x7. As a result, most photographers, even submini
photographers, think that submini cameras can only produce small enlargements
with decent quality -- say a 4x5 or 5X7 print. In fact, it's possible to
make enlargements that are much larger than this -- up to several feet in
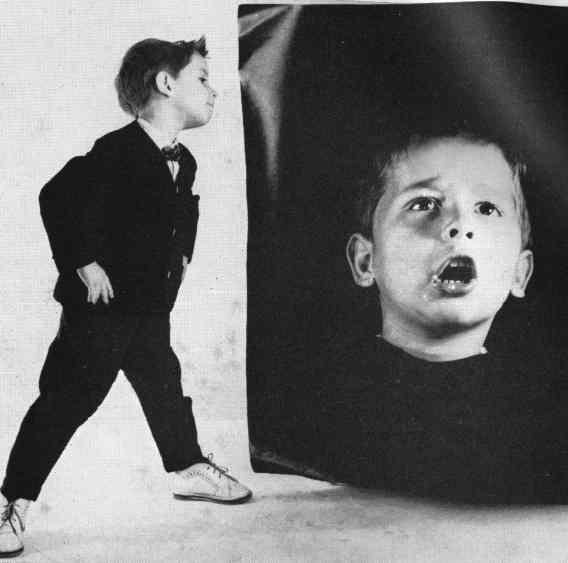
size. Here's an example. This enlargement was from a 14mmx14mm
negative:

But to accomplish this several approaches must be used together and
carefully:
-
FORMAT SELECTION -- The larger the format size, the easier it is to make
an extra-large print. Using a half-frame negative will allow for a bigger
print than a 16mm camera, assuming all other factors are approximately equal.
-
FILM SELECTION -- The film you use is crucial. Use the slowest you can, since
slower films generally mean finer grain and higher acutance. They also tend
to be more contrasty, which increases the appearance of sharpness. When a
small negative is enlarged to a great degree, the grain becomes very apparent.
Consequently, a fine-grained film is essential.
-
CAMERA LENS -- Every lens has a optimum f-stop where the various optical
aberrations are minimized. This is usually one or two stops down from the
maximum setting (ex. f5.6 on a f2.8 lens). Run a few tests to find out what's
best with your equipment.
-
CAMERA SUPPORT -- A tripod (no matter how small) or other camera support
becomes critical when making big prints from a submini. The larger the
magnification, the more apparent camera shakes become. An 8x10 print may
appear sharp, but an 11X14 print from the same negative may start to show
fuzziness, unless a tripod is used. If you are using a slower speed film,
camera support becomes even more important, since these films require slower
shutter speeds.
-
COMPOSING -- You'll have better luck in making BIG prints, the more of the
negative you use. If you need to crop the negative in the darkroom, your
results will be less than stellar. Move as close as you can to your subject
and cut out any extraneous compositional items. Crop in the camera, not in
the enlarger.
-
SUBJECT LIGHTING -- A higher contrast subject will appear sharper than a
lower contrast subject due to the more apparent line and edge effects in
the higher contrast lighting.
-
EXPOSURE -- Over- or under-exposure will give less than perfect results and
these will become more apparent in the larger print. Know how to expose the
film correctly.
-
DEVELOPER -- Some developers are designed to give less grain, some give higher
acutance, etc. Choose a developer, that gives good results with your film.
An average developer, may not give you the results you want.
-
DUST -- Even the tiniest speck of dust will turn into Godzilla in a super-size
print. Keep everything spotless, from the camera, the film, the cassette,
the chemicals and the enlarger.
-
ENLARGING -- Use a lens that is designed for extra large magnification; most
are not. Use the optimum f-stop for the lens. Make sure the enlarger is firmly
attached to the wall or table. At high magnification, almost anything can
cause enlarger vibration.
If you have any ideas, suggestions or comments about these pages, please
contact the Sub Club at the FRONT
DESK.
To return to the main index for the Sub Club click
here.
COPYRIGHT @ 1995, 1996, 1997, 1998, 1999, 2000, 2001, 2002, 2003, 2004, 2005 by Joe McGloin. All Rights Reserved.


