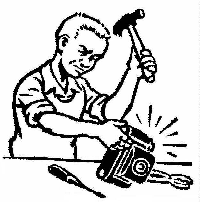
DOING YOUR OWN REPAIR WORK

It is possible to fix a Minolta 16 QT with a balky shutter release, but you need nerves of steel. The first thing I did was decide that the camera, which I've had for 13 years and it hasn't worked a day in all that time, was junk and I would cheerfully toss it if need be. This is an essential mental step for the amateur camera repairman. If you care too much, don't start to try to fix any camera. The odds are too high you will become unhappy.
You take out the screw inside the strap plug on the right side of the camera (as you hold it to take pictures) and that screw next to it as well. What idiot at Minolta decided these screws should be different sizes? On the other end take off the threaded ring around the tripod bushing and the screw next to it as well, but you don't need to take the PC plug out.
Open film chamber and take the screw out of the film take-up drive spindle. Take out spindle.
Lift the top off, using he edge by the film advance wheel to get a bit of leverage. The film advance wheel has a piece of plastic under it at the edge of its slot that is just glued on. It's easier to pull this off than try to thread the wheel through it.
My camera shutter was gummed up because the control levers under/around the film advance wheel were caked with dead oil/grease. Lacking anything a sane person would use to clean something, I got a can of carburetor cleaner out of the garage and put a dibby-dab on a Q-tip. I mopped around, lifting the advance wheel off and cleaning under the lever under it, especially, as this has to shift back and forth easily. I put a light coating of some model train light machine oil where it looked like it needed it.
The tricky part is putting the advance wheel back on because it has to do a number of things at once -- turn that little black geared wheel on the camera's left front while at the same time working the levers under it. Lift and replace until you see what's going on and which position makes the whole thing work properly. It took me about five minutes. You can turn and fire the shutter without the top on. The shutter release is on the right front of the camera. If you were careful taking the top off, the shutter button was sitting on top of it and fell off the first time you tipped the camera.
Reassemble, making sure the speed selector lever connects with its tab. The speed selector is a brass plate thingy (don't you love technical lingo) along the front of the camera with a lever poking up just back from the front. Push this over to the left, set the lever on the top place of the camera to 30, put back on and try it out to make sure the speeds are changing, otherwise you gotta do what I did which is take the whole damn thing apart again.
To put the shutter button back in place (it's not held down by anything) put it into the top plate before you put it on and put some tape ON THE OUTSIDE of the plate to hold it there while you put everything back on.
Needless to say, the battery in my camera is dead. I don't care, but I'll
still check out the rack of obscure batteries at Radio Shack the next time
I'm there.
Post Mortem notes:
After I got the whole thing put back together yesterday afternoon I noticed that the 1/30 speed was a bit draggy and erratic, so sunday morning I had some coffee to stop the shakes and took another dive. To mess with the speed controller you do NOT need to remove the film take-up spindle. In fact, I recommend against that because the screw that holds the film takeup spool in place also holds the film advance wheel inside the camera in place, and taking that off again, or even having it come loose, just complicates things for this operation
I took the top off and pondered the slow-speed escapement. If you look down in the front of the camera on the shutter-button side and work the shutter a few times it is clear to see -- a geared lever that rocks back and forth at 1/30, turning a wheel whose inertia provides the delay for the shutter. I put a VERY thin skin of oil along the top of these teeth, and also oiled the hinge it rotates on and the hinge of the device that it turns as it rocks back and forth. I cannot stress enough that if you do this, use high grade machine oil (model railroad shops sell it) and use very little. I took my tiniest screwdriver and put just barely enough to see on the end of it and let that soak into the hinges I was oiling. Better too little than too much. Do NOT use WD-40 as it evaporates after a while and leaves a skummy skin that jams things up. Do NOT spray anything in there -- I could tell you a story about squirting some WD 40 into my dad's camera to loosen things up that would make your hair stand on end.
Reassemble again and the shutter speeds now seem consistent. I have no shutter tester (I am NOT a repairman, just a tinkerer) but from my experience from 30 years of clicking cameras, it sounds about right.
To return to the main index for the Sub Club click here.
COPYRIGHT @ 1995, 1996, 1997, 1998, 1999, 2000, 2001, 2002, 2003, 2004, 2005 by Joe McGloin. All Rights Reserved.